
By default, Home and the call overview show all calls in the selected period. Filters let you zoom in on one or more campaigns, traffic sources, destinations or ratings. That way you can compare, for example, what Google Ads brings in against organic traffic, or how many appointments a location gets.
Filtering on Home
- In the Qooqie call tracking application, go to Calls > Home.
- Choose the period at the top right.
- In the filter bar below the title, click ‘Traffic source’, ‘Campaign’, ‘Destination’ or ‘Rating’. If not everything fits on your screen, the other filters are under ‘More filters’.
- Check one or more values. If a list has six or more options, you can search in it. Under ‘Traffic source’, ‘Select all’ checks all sources at once. The figures and charts update right away.
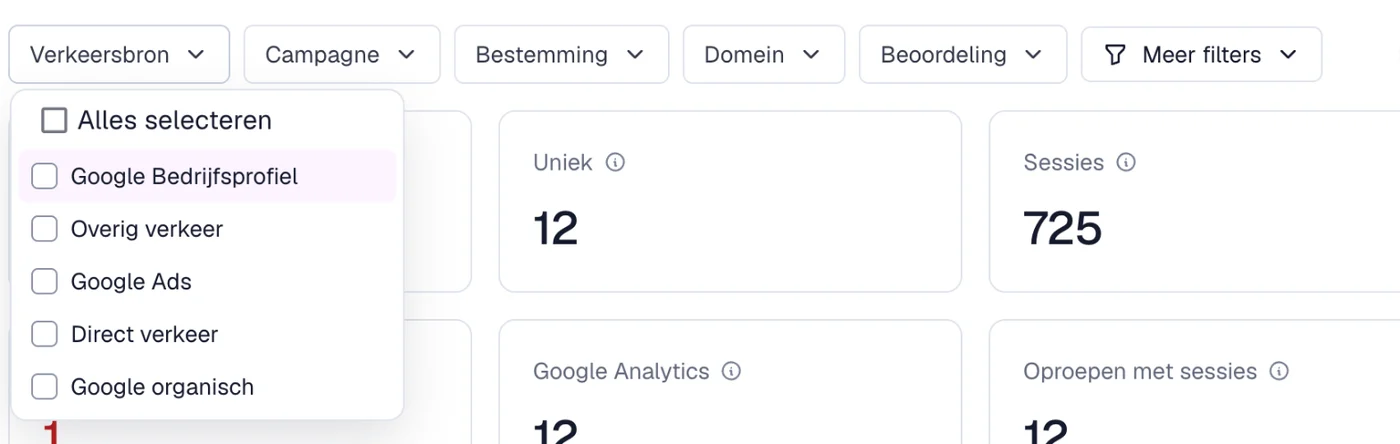
If you then click a figure, such as ‘Calls’ or ‘Missed’, Calls > Overview opens with the same filters. That way you immediately see the calls behind it.
Filtering in the call overview
- In the Qooqie call tracking application, go to Calls > Overview.
- Choose the period at the top left.
- Click ‘Filters’. The filter bar opens, with the same filters as on Home.
- Check the values you want to see. The ‘Filters’ button shows how many filters are on.
Your browser remembers the filters in the call overview, per organisation. When you come back later, they are still on. At the top of the overview you can also filter quickly by clicking ‘Missed’ or a rating. Click again to remove that filter.
How to work with the call overviewWhat do the filters mean?
- Traffic source: where the caller came from, such as Google Ads, Google organic, Google Business Profile or Direct traffic. You see the sources that brought in calls during the selected period.
- Campaign: the campaigns you created under Traffic sources. Archived campaigns are included too, with ‘(archived)’ after the name.
- Destination: your locations from Settings > Destinations. ‘No destination’ shows calls that do not belong to any location. This filter only appears if you have more than one destination.
- Rating: the ratings from your rating menu (Call rating module). ‘No rating’ shows calls that have not been rated yet.
- You can also filter by ‘Domain’ (if you have more than one domain), ‘Call duration’, ‘Type’ and ‘Advanced search’.
If you choose several values within one filter, you see calls that match any of those values. If you combine filters, you only see calls that match all of them. For example: traffic source Google Ads and rating ‘Appointment’ shows only appointments via Google Ads.
How to filter by call lengthBack to all data
- Uncheck the values in a filter, or click ‘Clear filters’. This removes all filters at once. The number in brackets shows how many filters are on.
- On Home, ‘Restore defaults’ also resets the period (this month) and the comparison.
Want to keep or share the filtered calls? ‘Export (CSV)’ downloads exactly the calls within your period and filters.
How to export calls

